
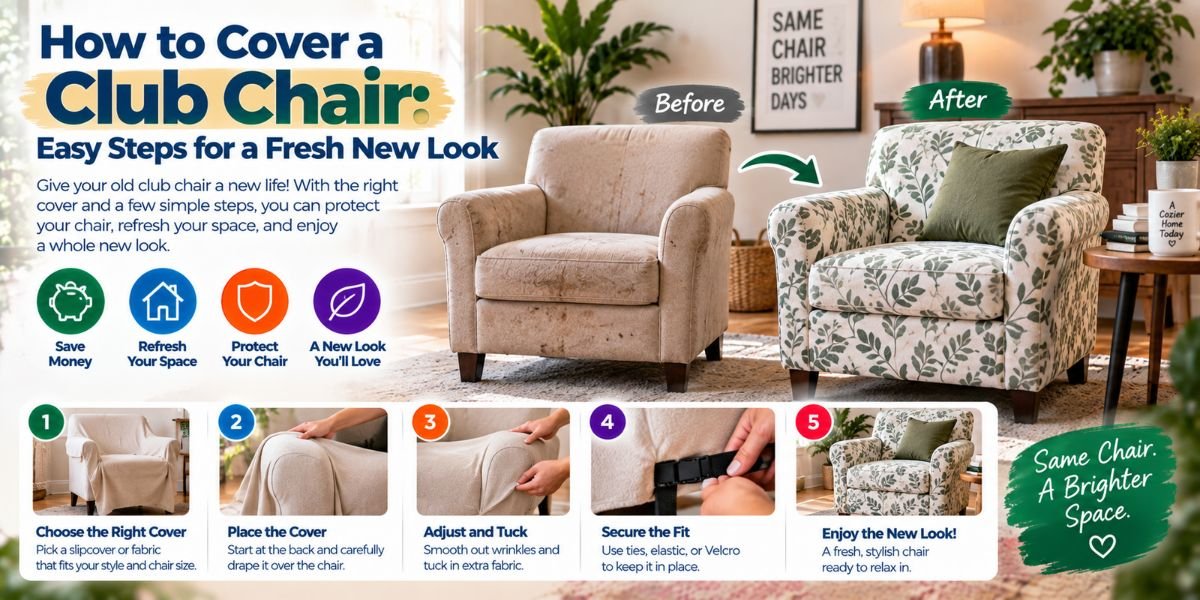
A club chair can make a room feel warm and cozy. But old fabric can make the same chair look tired.
The good news is that you can give a club chair a fresh look with new upholstery fabric. The job takes time, but the basic process is not too hard to understand.
I like to start with the fabric, the chair shape, and a simple plan. If you rush the measuring or cutting, small mistakes can become big problems later.
In this guide, I will explain how to cover a club chair from start to finish. I will also cover fabric choice, measuring, tools, common mistakes, and ways to get a cleaner result.
What Does It Mean to Cover a Club Chair?
Covering a club chair usually means replacing its old upholstery with new fabric.
This can mean a full reupholstery job. It can also mean making a fitted slipcover if you do not want to remove the original upholstery.
A full reupholstery job gives a more finished look. A slipcover is often easier to remove and wash.
For a classic club chair, full reupholstery usually gives the best result when the old fabric is badly worn.
Before You Start, Check the Chair
I would not buy fabric before looking closely at the chair.
Check the frame first. Look for loose joints, broken wood, damaged springs, or sagging support. New fabric will not fix a weak chair frame.
Next, check the padding.
Press the seat, arms, and back. If the padding feels flat or uneven, you may need to replace or add some before putting on the new fabric.
Also look at the old upholstery.
If it is only dirty or faded, a new cover may be enough. If it is torn, loose, or badly worn, a full reupholstery job may make more sense.
How Much Fabric Do You Need for a Club Chair?
Fabric needs vary because club chairs come in many shapes and sizes.
A common planning range is about 6 to 8 yards of 54-inch-wide fabric for a standard club chair. Some chairs need less, while large chairs, patterned fabric, skirts, extra cushions, or complex shapes can need more.
Do not treat this range as an exact number.
Measure your own chair before buying fabric. Pattern repeats and fabric direction can also increase the amount you need.
| Club Chair Type | Rough Fabric Range |
|---|---|
| Simple club chair | 5–6 yards |
| Standard club chair | 6–8 yards |
| Large or detailed chair | 8+ yards |
| Large pattern or matching design | More than a plain-fabric estimate |
If you are unsure, buying a little extra is safer than running short.
Running out of fabric near the end of a project can be very frustrating. A small extra amount is much easier to deal with.
Choose the Right Upholstery Fabric
The fabric you choose affects both the look and the life of the chair.
Start with the way you use the chair.
If the chair is used every day, choose a strong upholstery fabric. If it is mostly decorative, you may have more freedom with texture and appearance.
Solid Fabric
Solid fabric is often the easiest choice for a first project.
There is no pattern to match. Cutting is also simpler.
A solid color can make the chair feel clean and modern without changing its shape.
Patterned Fabric
Patterns can make a club chair stand out.
But they take more planning.
You need to think about how the pattern will look on the back, arms, seat, and cushions. A large pattern may also need more fabric because you have to line up the design.
Velvet
Velvet can give a club chair a rich look.
But it needs careful handling because the surface has a visible direction. If pieces face different ways, they may look like different shades.
For a first project, a simpler fabric can be easier to manage.
Tools You May Need
Gather your tools before removing the old cover.
You may need:
- Upholstery fabric
- Staple gun
- Upholstery staples
- Staple remover
- Scissors
- Measuring tape
- Marker
- Screwdriver
- Pliers
- Sewing machine, if needed
- Upholstery thread
- Pins
- Tack strips, if needed
- Upholstery foam or batting, if needed
- New welt cord, if needed
The exact tools depend on how the chair was built.
Keep a small container nearby for old staples and hardware. This makes cleanup much easier.
Step 1: Take Photos Before You Remove Anything
This is one of the easiest steps to skip.
Do not skip it.
Take photos of the chair from every side before you remove the old fabric.
Take close photos of the corners, arms, cushion, back, seams, and fabric folds.
These photos give you a visual map.
When the chair is stripped, it can be hard to remember how each piece was attached. Your photos can show you where each piece belongs.
Step 2: Label the Old Fabric Pieces
Remove the old fabric carefully.
Do not throw each piece away as soon as you remove it.
Instead, label each piece.
You might write:
- Inside back
- Outside back
- Left arm
- Right arm
- Seat
- Front arm
- Cushion top
- Cushion bottom
The old fabric can become your cutting pattern.
This is one of the most useful parts of the process because the original pieces already match the shape of your chair.
Step 3: Remove Staples Carefully
Use a staple remover or pliers to lift the old staples.
Work slowly.
It is easy to damage the wood if you force a staple out too quickly.
Remove loose staples from the frame before adding new ones. Old metal pieces can get in the way and make the new fabric harder to attach.
Keep track of any screws, clips, or other hardware you remove.
Step 4: Inspect the Padding
Once the old fabric is off, look at the padding.
Do not automatically replace everything.
If the foam and batting still feel good, you may be able to reuse them.
If the seat has deep dents or the foam has broken down, replace the damaged material before covering the chair.
A new cover looks much better when the padding underneath is even.
Step 5: Use the Old Fabric as a Pattern
Lay each old fabric piece flat.
Place it on your new fabric.
Make sure the fabric faces the correct way before cutting.
This matters with patterns, stripes, velvet, and other directional fabrics.
Do not cut too close to the old piece.
Leave enough extra fabric around the edges so you have room to pull and attach it.
A little extra is useful. Fabric that is too small cannot be fixed easily.
Step 6: Mark Every New Piece
Before cutting, mark each piece.
Write the name on the back of the fabric or attach a small label.
Also mark important points.
For example, you can mark:
- Center
- Front
- Back
- Left
- Right
- Top
- Bottom
These small marks can save a lot of time later.
They are especially helpful when several pieces look almost the same.
Step 7: Cut the New Fabric
Cut one piece at a time.
Do not rush through the whole roll of fabric.
Check the direction of the pattern before every cut.
If you are using a printed design, think about where the main part of the pattern will sit. A flower, stripe, or large shape may look better when centered on the chair.
Measure twice before cutting.
This is one place where being slow can save fabric.
Step 8: Replace Damaged Padding
Now is the time to fix the inside of the chair.
Add new foam where needed.
You can also use batting to soften hard edges and create a smoother shape.
Do not add too much material.
Extra padding can change the shape of the chair and make the new cover difficult to fit.
The goal is an even, comfortable surface.Read moreHow to Build a Club Chair: A Simple DIY Guide for a Sturdy, Comfortable Seat
Step 9: Start Attaching the New Fabric
Begin with the main inside areas.
The exact order can vary by chair design, but many upholstered chairs are covered by working through the inside back, seat, arms, and outer panels.
Start with a few staples.
Do not fully staple one side before checking the opposite side.
Instead, attach the fabric loosely at several points.
This lets you adjust the position.
Once everything looks centered and smooth, add more staples.
Step 10: Keep the Fabric Smooth
This is where patience matters most.
Pull the fabric firmly, but do not stretch it so hard that the surface becomes distorted.
Work from the center toward the edges.
Check the surface after every few staples.
If you see a wrinkle, fix it before adding more staples.
It is much easier to correct five staples than fifty.
For cushions, keep the fabric smooth across the top and make sure the corners stay neat.
Step 11: Work Carefully Around the Arms
Club chair arms can be tricky.
They often have curves and several layers of upholstery.
Start by positioning the fabric correctly.
Check the front of the arm before securing the sides.
Make small cuts where needed so the fabric can follow the curve. Do not make large cuts at once.
Too much cutting can leave a gap that is hard to hide.
Take your time around corners and curves.
Step 12: Add the Outside Panels
Once the main upholstery is secure, work on the outside back and outside arm panels.
These areas can make a big difference to the final look.
Keep seams straight.
Make sure the fabric is not twisted.
Pull the fabric evenly before securing it.
If your chair uses decorative trim or welt cord, install it where the original design calls for it.
Step 13: Finish the Bottom
The bottom of the chair is easy to forget.
After the main upholstery is complete, cover the underside with suitable bottom fabric.
Keep the edges neat.
Trim excess material before finishing the staples.
Do not leave loose fabric hanging underneath.
A clean bottom helps protect the inside and gives the project a finished look.
Common Mistakes to Avoid
Buying Too Little Fabric
This is one of the biggest problems.
Do not rely only on a general yardage chart.
Your chair may be larger than a typical club chair. It may also have cushions, skirts, piping, or a large pattern.
Measure first.
Cutting Before Checking the Pattern
A beautiful fabric can look wrong when the pattern is off-center.
Lay out your pieces before cutting.
Think about how the design will look when the chair is finished.
Pulling the Fabric Too Hard
Tight fabric is good.
Overstretched fabric is not.
Too much tension can change the pattern and create an uneven surface.
Pull the fabric firmly and evenly instead.
Removing All the Old Fabric at Once
This can make the project confusing.
The old cover can help you understand the chair’s construction.
Remove pieces carefully and label them as you go.
Ignoring the Cushion
A new chair cover cannot hide a badly worn cushion.
Check the foam and filling before finishing the upholstery.
If the cushion is flat, fix it while the chair is open.
How to Make a Club Chair Look More Professional
Small details can make a big difference.
Keep the pattern centered.
Keep seams straight.
Make both arms look balanced.
Avoid wrinkles.
Trim excess fabric neatly.
Use matching or coordinating welt cord when appropriate.
Most of all, do not rush.
Upholstery rewards patience more than speed.
Should You Use a Slipcover Instead?
A slipcover can be a better choice in some homes.
It is useful when you want to change the look of the chair without permanently removing the old upholstery.
A washable cover can also be helpful for homes where the chair gets heavy daily use.
The downside is fit.
A loose slipcover can look messy if it does not follow the chair’s shape.
For a fitted, permanent finish, reupholstery is usually the better option.
When Should You Hire a Professional?
A simple chair can be a reasonable DIY project.
But some club chairs are much more complex.
Consider professional help if the frame is damaged, the chair has complicated springs, the upholstery has deep tufting, or the fabric is expensive.
Professional help can also make sense when the chair has sentimental or high monetary value.
A mistake on an expensive fabric can cost more than paying for skilled work from the start.
How to Cover a Club Chair Without Making It Look Homemade
The key is not one special trick.
It is careful preparation.
Measure the chair.
Study the old cover.
Label every piece.
Choose enough fabric.
Plan the pattern.
Cut carefully.
Attach the fabric in small steps.
Check your work often.
When I look at a finished upholstered chair, the details are what stand out most. A smooth arm, clean corner, straight seam, and centered pattern can make a basic fabric look much better.
FAQs
Can I cover a club chair myself?
Yes. A club chair can be a DIY upholstery project if the frame and structure are in good shape. The hardest parts are usually measuring, cutting, fitting curves, and keeping the fabric smooth.
How many yards of fabric do I need for a club chair?
A standard club chair often needs around 6 to 8 yards of 54-inch-wide fabric. The exact amount depends on the chair size, cushions, fabric width, pattern repeat, and design details.
What fabric is best for a club chair?
A durable upholstery fabric is a good choice for a chair used every day. Solid fabrics are easier for beginners, while large patterns and directional fabrics need more planning.
Can I put new fabric over old upholstery?
Sometimes, but it is usually better to inspect the old cover first. Covering over damaged or bulky upholstery can create wrinkles and change the chair’s shape.
Is it better to reupholster or use a slipcover?
Reupholstery gives a more fitted and permanent result. A slipcover is easier to remove and can be useful when you want a washable or changeable cover.
Conclusion
Learning how to cover a club chair takes patience, but the process is manageable when you break it into small steps.
Start by checking the chair. Measure before buying fabric. Save the old upholstery pieces and use them as patterns. Cut carefully and attach the new fabric a little at a time.
The biggest lesson is simple: do not rush the parts that affect the fit.
A well-planned fabric choice, clean cuts, even tension, and careful finishing can turn an old club chair into a piece that feels fresh again.