
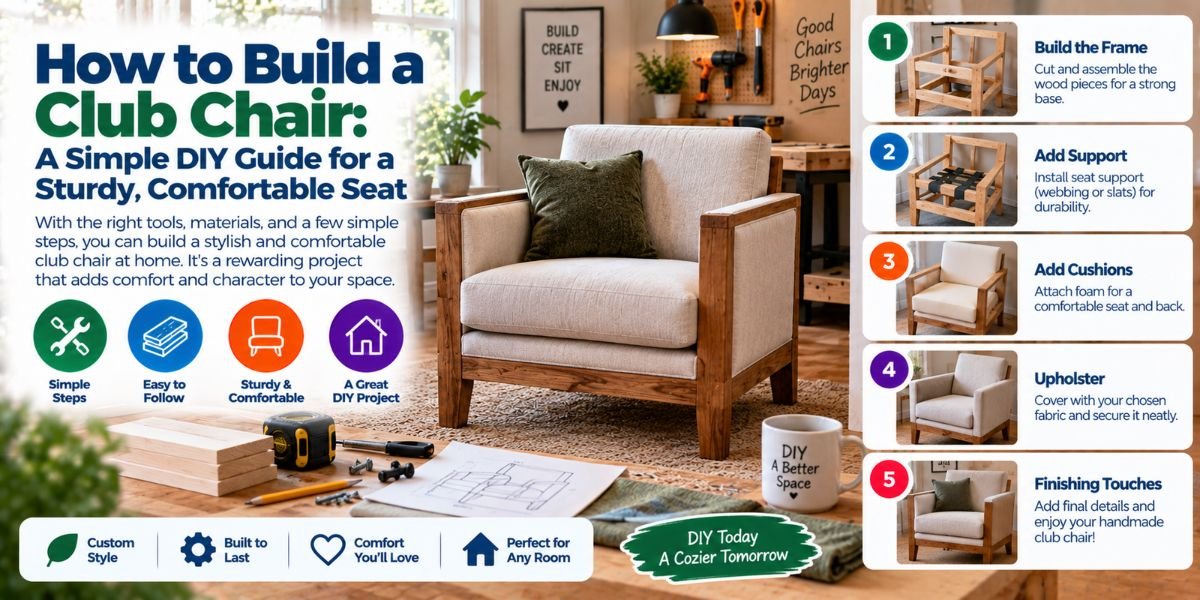
A club chair can make a room feel warm and inviting. It has a deep seat, wide arms, and a strong frame. It also looks like a hard project to build.
But you can build one at home if you break the work into small steps.
The main job is to make a solid wood frame first. Then you add the seat, foam, fabric, and finishing details. Good measurements matter at every stage.
In this guide, I’ll show you how to build a club chair from the frame up. I’ll also cover tools, materials, measurements, common mistakes, and simple ways to make the chair more comfortable.
What Is a Club Chair?
A club chair is a large upholstered chair with a deep seat and fixed arms. Many designs have a low back and thick cushions.
The style is often linked with leather chairs, but you can use many types of fabric. Cotton, linen blends, velvet, and other upholstery fabrics can all work when they are made for furniture use.
A club chair is usually built around a wooden frame. Foam, batting, and fabric then cover the frame.
The shape is simple, but the chair must be strong. It needs to support your weight without rocking, twisting, or loosening.
What You Need to Build a Club Chair
Before you start, gather the main materials and tools.
Materials
You will usually need:
- Hardwood or strong structural wood for the frame
- Plywood for selected panels
- Wood screws
- Wood glue
- Upholstery webbing or suitable seat support
- High-density upholstery foam
- Polyester batting
- Upholstery fabric
- Upholstery thread
- Upholstery staples
- Upholstery adhesive, where needed
- Chair legs or suitable feet
The exact amount depends on your chair design and measurements.
Do not buy all the fabric before you finish your measurements. The amount needed can change with the chair shape and pattern direction.
Tools
Useful tools include:
- Tape measure
- Pencil
- Square
- Saw
- Drill
- Screwdriver or driver bit
- Clamps
- Staple gun
- Scissors
- Utility knife
- Foam cutter or sharp knife
- Sewing machine, if your design needs sewn covers
- Sandpaper
A jigsaw can help with curved pieces. A circular saw can make straight cuts easier.
Plan the Club Chair Before Cutting Wood
The best place to start is not the saw.
Start with a simple drawing.
Decide how wide and deep you want the chair to be. Then decide the seat height and back height.
A comfortable club chair often has a fairly deep seat. But do not make it so deep that your feet cannot rest well on the floor.
Also think about where the chair will go.
A large club chair can take up more room than expected. Measure the room, doorway, hallway, and any tight turns the chair must pass through.
I would also mark the chair footprint on the floor with tape. This gives you a quick view of its real size before you cut anything.
Choose Comfortable Club Chair Measurements
There is no single correct size for a club chair.
Your measurements should match the person who will use it and the space around it.
As a starting point, you might consider:
| Part | Practical Starting Range |
|---|---|
| Overall width | 30–40 inches |
| Overall depth | 30–40 inches |
| Seat height | 17–19 inches |
| Seat depth | 20–24 inches |
| Arm height | About 22–27 inches |
| Seat cushion thickness | About 4–6 inches |
These are starting ranges, not fixed rules.
The thickness of the cushions changes the final seat height. The frame, foam, batting, and fabric all add to the finished size.
For that reason, plan the full build rather than cutting every part from one measurement.
Build the Main Club Chair Frame
The frame is the most important part of the project.
Start with the lower base. Build a strong rectangular structure that will support the seat and connect the legs or feet.
Use square cuts where possible.
Check every corner with a square before tightening the screws. If the base is out of square, the problem can carry through the rest of the chair.
Apply wood glue to the joints where appropriate. Then use screws or another suitable mechanical fastener to hold the pieces together.
Clamps can help keep the parts in place while you work.
Do not rush this step.
A frame that feels slightly loose on the workbench will not become stronger after you add foam and fabric.
Add the Back and Side Frames
Once the base is solid, build the back and side sections.
The arms are a key part of a club chair. They give the chair its classic shape and also need to handle regular pressure.
Build both sides to match.
Measure from the same reference points instead of relying only on visual judgment. Even a small difference can make the finished chair look uneven.
Attach the back frame to the base and side frames.
Then check the entire structure.
Place it on a flat surface and look for rocking. Check the corners and joints. Make sure the frame feels rigid before moving to upholstery.
Add Seat Support
The seat needs strong support under the cushion.
Depending on the design, you can use plywood, upholstery webbing, springs, or another suitable seat-support system.
A simple DIY build may use a properly supported plywood seat. Webbing can also provide a more traditional upholstered feel when installed correctly.
If you use webbing, keep the tension even across the seat.
Do not leave large gaps between support strips. The cushion can sag if the support underneath is too weak or uneven.
The support system should match the foam and cushion design you plan to use.
Sand and Prepare the Frame
Before covering the chair, sand the exposed wood.
You do not need a furniture-grade finish because much of the frame will be hidden. But rough edges can damage fabric and foam.
Pay special attention to corners and edges.
Remove splinters and sharp points. Check every place where fabric may touch the frame.
This is also a good time to make sure all screws are secure.
Once the upholstery is added, fixing a loose frame becomes much harder.
Cut the Foam for the Seat
The seat cushion is where comfort becomes very noticeable.
Choose upholstery foam made for seating. Soft craft foam may not hold up well under regular use.
Measure the cushion area carefully.
Cut the foam with a sharp knife or foam-cutting tool. Keep the cut as straight as possible.
If the foam is uneven, the finished cushion can look lumpy.
Do not make the cushion too large for its cover. The cover needs room to fit around the foam without forcing the seams apart.
A slightly rounded front edge can also create a softer look.
Add Foam to the Back and Arms
The back and arms can use foam as well.
The amount depends on the look you want.
A firm foam layer gives the chair a cleaner shape. A softer layered design can create a fuller and more relaxed appearance.
Use foam carefully around corners.
Sharp foam corners can make the upholstery look boxy. Light shaping can help create a smoother transition.
When adding foam to the arms, keep both sides similar.
Stand back often and compare them from the front. It is much easier to fix uneven foam before the fabric goes on.
Add Batting
Batting helps soften the shape of the chair.
It can also hide small changes in the foam and create a smoother surface beneath the fabric.
Wrap the batting around the areas that need it. Keep the material smooth and avoid large folds.
Staple it to the hidden parts of the frame.
Do not pull it so tightly that the chair loses its intended shape.
The goal is a smooth surface, not maximum tension.
Measure and Cut the Upholstery Fabric
This is one of the places where mistakes can become expensive.
Measure each section before cutting.
Leave enough extra fabric for wrapping around the frame and securing it underneath.
If your fabric has stripes, checks, or another pattern, think about pattern placement before you make your cuts.
A small pattern shift can be very noticeable on the front of a chair.
It is better to use more fabric than to cut a piece too small.
You can trim excess material later. You cannot easily add fabric to a piece that was cut too short.Read moreHow Much Does It Cost to Reupholster a Club Chair: What You’ll Really Pay
Upholster the Club Chair
Start with the areas that are easiest to control.
Pull the fabric over the surface and place a few temporary staples first. Check the position before adding more.
Then work from the center toward the edges.
Keep the tension even.
Do not pull one side extremely tight while leaving the other side loose. This can create wrinkles and make the chair look uneven.
Corners need special care.
Fold the fabric neatly and hide the folds where possible. Trim excess material only after you are happy with the shape.
Take your time around the arms. They are one of the most visible parts of a club chair.
Attach the Seat Cushion Cover
If your design uses a removable cushion, sew a fitted cover around the foam.
Measure the foam before cutting the fabric.
The cover should be snug without crushing the cushion.
A zipper can make the cover easier to remove for cleaning. Make sure the zipper is placed where it will not create discomfort during normal use.
If you do not have sewing experience, keep the cushion design simple.
A basic box cushion is easier to plan than a complex shaped cover.
Add the Chair Legs
Install the legs or feet after the main frame is ready.
Make sure the attachment points are strong and evenly positioned.
The legs need to support the full chair and the person sitting in it.
Check that all legs touch the floor correctly.
A chair that rocks can be annoying and may place extra stress on the frame.
If the floor is uneven, suitable furniture feet or levelers can help with small differences.
Check the Finished Club Chair
Before using the chair, inspect the entire build.
Sit down slowly at first.
Check for movement, creaking, loose joints, or unusual flex.
Look at the seat from the side and front. Make sure the cushion sits evenly.
Check the fabric for loose areas and wrinkles.
Also inspect the staples. None should be exposed where they could scratch someone.
If something feels loose, fix it before regular use.
It is much easier to repair a problem now than after the chair has been used for months.
Common Club Chair Building Mistakes
Making the Seat Too Deep
A deep seat can feel comfortable at first, but too much depth can make it hard to sit upright.
Think about the user’s height before setting the final seat depth.
Using Weak Wood
The frame carries most of the load.
Do not treat it like a decorative box. Use suitable structural material and strong joints.
Skipping the Square Check
A frame can look fine while being slightly out of square.
Use a square during assembly. Measure opposite corners when checking a rectangular section.
Cutting Fabric Too Early
Fabric waste can happen when measurements change during the build.
Finish the frame and foam layout first. Then make your final fabric plan.
Pulling Fabric Too Tight
Too much tension can distort the foam and create strange shapes.
Use steady, even pressure instead.
Ignoring Doorway Clearance
A finished club chair can be difficult to move.
Measure the route into the room before you build a very large chair.
How to Make a Club Chair More Comfortable
Comfort starts with the frame, but the cushion has a major effect too.
Choose foam suited to seating. Then think about the seat height and depth.
The back angle also matters.
A slightly reclined back can feel more relaxed than a perfectly upright back.
Arm height matters as well. Your arms should be able to rest naturally without your shoulders feeling raised.
A small lumbar cushion can also change the feel of a deep chair.
You do not need to make the chair huge to make it comfortable. Good proportions usually matter more than extra size.
How Long Does It Take to Build a Club Chair?
The time can vary a lot.
A simple frame with basic upholstery may take a few days of part-time work. A detailed chair with shaped foam, sewn cushions, complex fabric, or decorative upholstery can take much longer.
Your experience also matters.
A person who has built furniture and upholstered chairs before will usually move faster than a first-time DIY builder.
Do not rush the upholstery stage just to finish quickly.
Most visible mistakes happen when fabric is cut or attached too fast.
Is Building a Club Chair Worth It?
Building a club chair can be worthwhile if you want a custom size, fabric, or shape.
You can make the chair fit your room instead of trying to fit your room around a store-bought chair.
It can also be a useful project if you already have woodworking and upholstery tools.
The downside is time.
Buying a finished chair is much faster. Building one yourself also requires careful measuring, cutting, assembly, and upholstery.
For me, the biggest benefit of a DIY build is control. You decide the size, seat feel, fabric, and overall shape.
FAQs
How hard is it to build a club chair?
A club chair is a moderate DIY project. The wood frame is manageable, but accurate upholstery takes patience and care.
What wood is best for a club chair frame?
Use strong, stable wood that is suitable for furniture framing. The important part is creating rigid joints that can handle regular loads.
How thick should club chair foam be?
A seat cushion is often around 4 to 6 inches thick, but the best thickness depends on the frame and desired seat height.
Can I build a club chair without sewing?
Yes. Some designs can use upholstery methods that avoid complex sewn covers. A removable cushion, however, is easier to finish neatly with a sewn cover.
How much fabric do I need for a club chair?
The amount depends on the chair’s size, shape, cushion design, and fabric pattern. Measure each part and allow extra fabric for wrapping and mistakes.
Conclusion
Learning how to build a club chair is easier when you treat it as several small projects instead of one large job.
Start with a strong frame. Get the measurements right. Build good seat support. Then add foam, batting, and fabric with care.
The most important lesson is simple: do not rush the parts that affect comfort and strength.
A well-planned club chair can give you a custom seat that fits your room and your style. With careful measuring and steady work, you can turn basic materials into a chair that feels like it belongs in your home.